How to Create a Super Shiny Pencil Icon
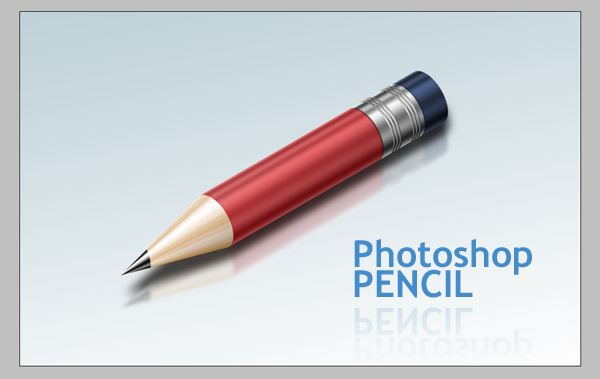
The Pencil is one of the visual metaphors most used to express creativity. In this tutorial, I’ll show you how to draw a pencil icon. We’ll have a look at gradients, selection tools, and basic transform operations. Let’s have some fun with this.
Step 1
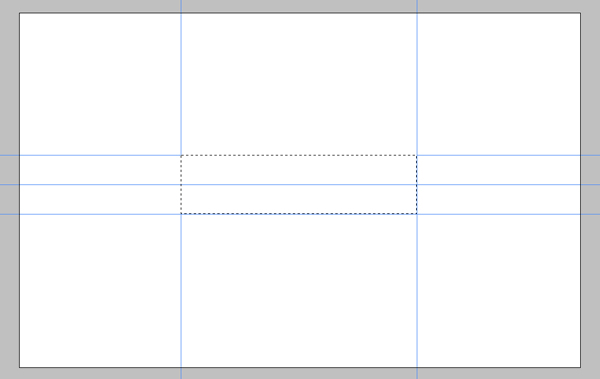
Create a New Document 950 pixels wide by 600 pixels heigh, set the Resolution to 300 pixels/inch, and the Background to white. Make a rectangular selection with a Style of Fixed Size, a Width of 400 px, and Height of 100 px.

Step 2
Drag and snap guides to all edges and vertical center of the selection.
Step 3
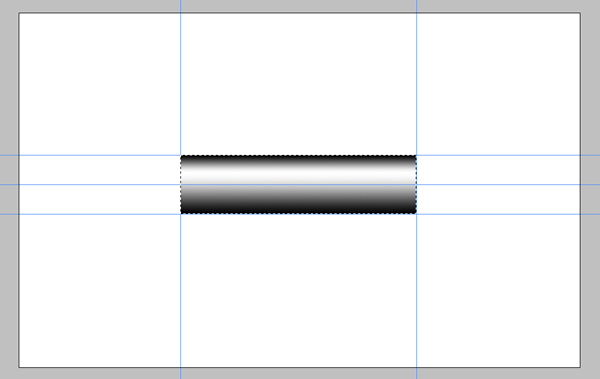
Open the gradient picker and select the "Steel Bar" preset from the drop down menu. If you can’t see the preset in the list, click the triangle button on the right and select "metals" from the list. Click Append. Create a new layer and name it "Body." Fill the selection with the gradient from bottom to the top of the selection.
Step 4
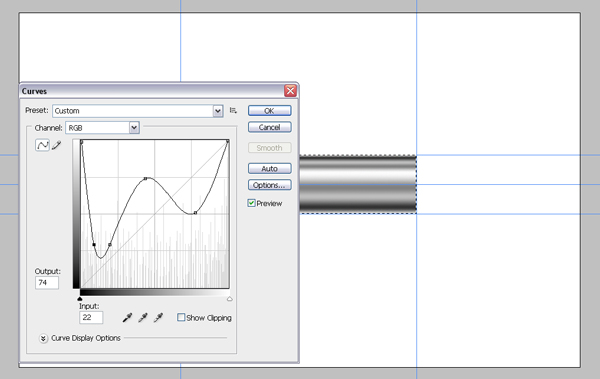
To make our pencil more reflective go to Image > Adjustments > Curves (Command + M), and adjust it as in the below image.
Step 5
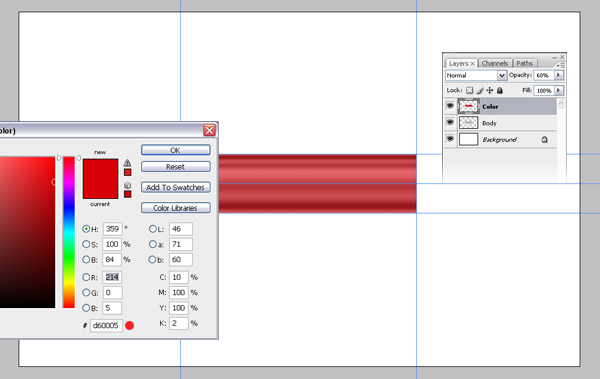
With the selection still active, create a new layer and fill the selection with the color #d60005, then set the layer Opacity to 60%. Name the new layer "Color."
Step 6
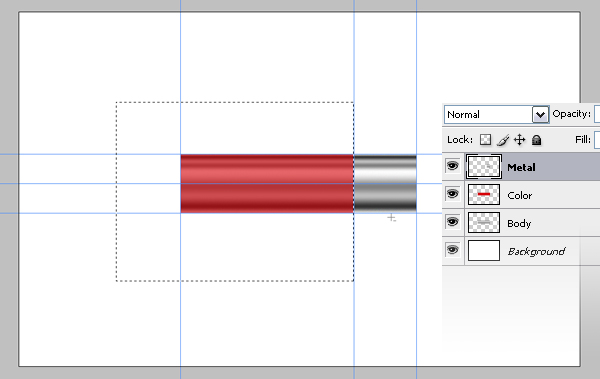
Right click the "Body" layer and duplicate it. Name it "Metal" and move it to the top of the layer stack. Select the Rectangular Marque Tool, set style to "normal," make a selection as in the image below, and hit Delete. Drag a guide from the left ruler and snap it to right edge of the selection.
Step 7
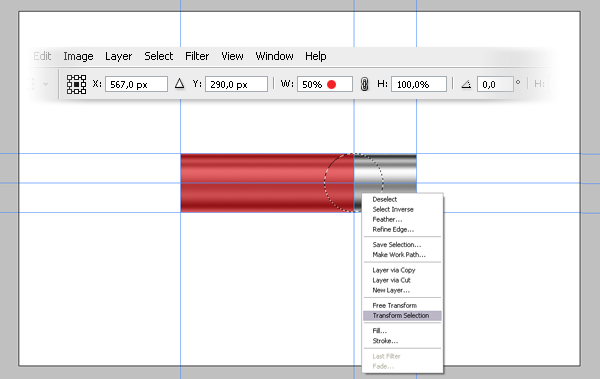
Select the Elliptical Marque tool and make a selection from point 1 in the image while holding down the Alt and Shift keys. Right-click inside the selection and choose Transform Selection, then set the Horizontal Scale to 50%, and hit Enter twice to apply. Hit Delete to delete the selected area. This will give our pencil a perspective look.
It’s a good idea to save it because we will need this selection later. Go to Select > Save Selection. Name the selection "Ellipse."
Step 8
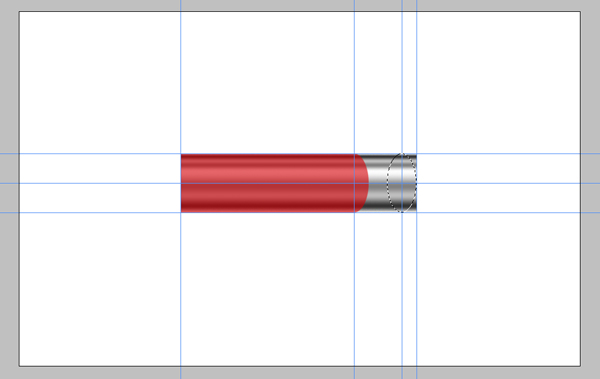
With the Marque tool still selected, drag the selection towards the right edge of the "Metal" layer. Drag another vertical guide until it snaps to the center of the selection.
Step 9
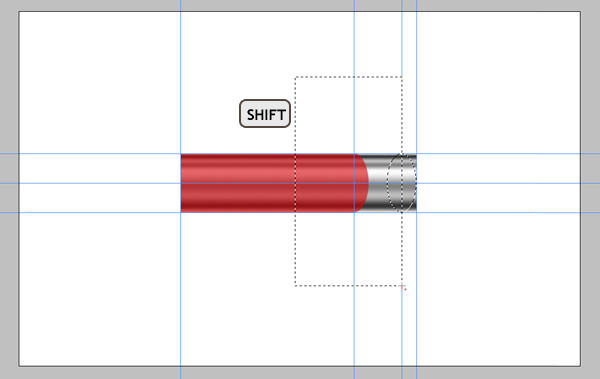
Pick the Rectangular Marque tool, then while holding down the Shift key, make a selection as shown below. Go to Select > Inverse and hit Delete.
Step 10
While holding down the Command key, click the "Metal" layer to load the selection (Click on the thumbnail of the layer, not on the layer name). With any selection tool selected, move the selection 4 pixels right. You can do it by pressing the Right Arrow on the keyboard 4 times.
Go to Select > Inverse. While holding down the Command + Alt + Shift keys, click on the "Metal" layer. Alt + Shift combination is for intersecting the already selected area and the new selection that we’re going to make. The new selection is the metal part because we’re holding down the Command key as well. So the metal part and our current selection will be intersected. Using this selection make a thin line on the metal part selected. Use these lines to make the bumps.

Step 11
Copy and paste the selection into a new layer and name it "Bump." Apply a Gradient Overlay and Bevel and Emboss with these settings. To make it slightly bigger than the metal layer, hit Command + T, and set the Vertical Scale to 102%.

Step 12
Duplicate the "Bump" layer and move the copy 6 pixels to the right. Repeat this step once more to make a total of 3 bumps. Select these 3 layers and merge them (Command + E.) Duplicate the merged layer to create another set of bumps and place it as you like.

Step 13
Duplicate the "Metal" layer and name the copy "Eraser". Drag the "Eraser" layer below the "Metal" layer. Move the "Eraser" layer about 60 pixels right. Go to Image > Adjustments > Hue/Saturation (Command + U.) See the image below for the Hue/Saturation settings.
Duplicate the "Metal" layer again and name the copy "Shadow." Drag the "Shadow" layer below the "Metal" layer. Hit Command + U and bring the lightness to -100. Go to Filter > Blur > Motion Blur. Set the Angle to 0 and Distance to 5, then apply it. Now we can merge the layers related to the metal part of the pencil. Choose "Shadow," "Metal," and Bump layers, then Hit Command + E to merge them.

Step 14
Create a new layer and name it "Tip." Using the Polygonal Lasso tool make a selection, as in the image below. Fill the selection with a light yellow orange. Move this layer down below the "Body." Go to Select > Deselect to loose the selection (Command + D).

Step 15
Select and Duplicate the "Body". Name the new layer "TipGradient." Move this layer to the top. Hit Command + T, then set the scale and position as in the below image. Hit Command + U to bring up the Hue/Saturation dialog box and use these settings: Hue set to 33, Saturation set to 53, Lightness set to +37, and Colorize Checked.

Step 16
Drag "TipGradient" layer down below the "Body" layer. Hold down Alt and click between the "TipGradient" and "Tip" layers.

Step 17
With "TipGradient" layer selected, go to Edit > Transform > Perspective and adjust the perspective like this.

Step 18
Go to Select > Load Selection, and load the selection "Ellipse." Position the selection as in the image, then Delete the selected area from both the "Body" and "Color" layers.

Step 19
With the "Color" layer selected, create a new layer and name it "Wood." Press D on the keyboard to change the Foreground and Background colors to black and white. Press X to make foreground white. Fill the selection with white. Then go to Filter > Render > Fibers. Use 10 for both variables. Hit Command + T, rotate it 90 degrees counter clockwise, and scale it as shown below.

Step 20
Go to Edit > Transform > Perspective and adjust the perspective as shown. Set the Blending Mode to Soft Light and Opacity to 60%.

Step 21
Get the Elliptical Marque tool and make a selection, as shown below. Select the "Wood" layer and hit delete. Select the "TipGradient" layer and hit Command + U, then set the Saturation to -100. Hit Command + L and apply these settings. This will make the tip darker and high contrast.

Step 22
Now we’re about to finish. Select all the layers except the "Background" layer and Hit Command + E to merge them. Rename the layer as "Pencil." Duplicate the "Pencil" layer and name it "Reflection." Drag the "Reflection" layer below the "Pencil" layer.
Duplicate the "Reflection" layer again, and name it "Shadow." With the "Shadow" layer selected hit Command + U and set the Lightness to -90. Hit Command + T and scale it to three-fourths of its height. Choose the "Reflection" layer, then go to Edit > Transform > Flip Vertical.

Step 23
With all layers selected except the "Background" layer, hit Command + T, and rotate them -30 degrees. Move the "Shadow" and "Reflection" layers as shown below.

Step 24
Choose the "Reflection" layer and go to Filter > Blur > Gaussian Blur. Apply it with a Radius of 3 and set the Opacity to 60. Choose the "Shadow" layer, then go to Filter > Blur > Gaussian Blur. Apply it with a Radius of 7 and set the Opacity to 80.

Step 25
With the "Reflection" layer selected, add a Layer Mask using the Add Layer Mask button, which is located at the bottom of the Layer Palette. Fill the mask with the Gradient tool, from white to black, which makes the shadow vanish.

Step 26
With the "Pencil" layer selected, apply a Gradient Overlay with these settings.

Step 27
That’s it! You can change the position and also change the background color if you wish.

0 Response to "How to Create a Super Shiny Pencil Icon"
Post a Comment